Showing posts with label Jewish Holiday. Show all posts

Friday, April 3, 2015

Throwback Passover Plague Tablescape

I am throwing it back to 2011 today (which is actually getting a little ahead of myself, as I am working in my 2010 album). I just had to share this throwback Passover post in honor of the holiday tonight!

The Seder, which literally means order but is also the term for our holiday meal, involves eating symbolic foods while reciting the story of the Jews exodus from Egypt. Central to the Passover narrative are the plagues that G-d brought upon Egypt in an effort to liberate the Jewish people from slavery. These plagues confound us and cause us to question on deep levels (like why could G-d simply not deliver the Jews without inflicting harm on many innocent Egyptians--or were they not innocent because the lived in a society that accepted slavery). The deep questioning is sort of the point, but for kids, they must first understand the story literally before they can "get there." When my minis were very young, I decided to make my table-scape surrounding the plagues and symbolic foods so that the would learn about them. Cue the bugs, frogs, and wild beasts! Don't forget the bitter herbs, and I wanted it to be a pretty Spring table! Here it was:


I did three tables to match each other in the kitchen, dinning room, and playroom tables (we conducted the service in the living room and split up for dinner). Above is the dinning room. I made these simple runner with fabric and stitch-witch iron on. They have been washed a lot over the ensuing 4 years and have held up beautifully. I also marched ants, and frogs across the tables to symbolize the palgues. In lieu of flowers, I used white buckets from the Target dollar spot and herbs (of course):


I set the buffet with little trees that I normally use for Tu B'Shevat and made adorable "plague pops" (kosher for Passover cake turned into wild beasts and frogs):


I also made simple Spring yarn wreaths (before I moved on to deco-mesh with a froggy theme). It was a good way to tech the kids; now they are a little older, we can move a bit beyond the basics.

Whatever you observe this weekend (Easter, Passover, both, or Nothing at all), I hope that it is a joyous and meaningful time with those you love!

Wednesday, March 4, 2015

Dollar store baskets that look like a million bucks: Part 3

I am finally back with my own Purim Baskets! Purim is a FUN holiday (not only does giving of baskets to loved-ones, masquerading and revelry are big parts of the day). I knew I wanted to do something fun and to incorporate masks. I went with "S'mores Purim Fun!" It checks the box for the tradition of giving at least two types of food and what could be more fun than a basket of s'mores fixings?!

Sometimes the items I find at the dollar store guide the theme like with the baseball baskets in part one of this series. Since I already had a theme, however, I just needed a plain-jane basket to hold it. I thought it would be fun to let you in on some of my tricks to styling a perfect basket.


Step One: Find an appropriate sized basket for your items. If your vessel is too big, your items will appear too austere; you want to give the appearance of being plentiful. I got these cute little baskets in a 2 pack. Don't forget to buy filler. You will need tissue paper, crinkle paper, or even crushed newspaper to bolster your basket items. Here, I went with a multi-colored crinkle to add visual interest.

Step Two: Label your items. Of course my recipients know the parts of S'mores, but I made printed quick shipping labels with "s'more chocolate," "s'more graham crackers," and "s'more marshmallows" along with masks. I just think it completes the look. Begin placing your sturdiest items in the basket pointing in opposite directions. It balances the basket and shows off your cute labels.

Step Three: Add a cute sign that ties it all together. My big girl and I had a blast customizing masks for our signs with our saying "S'more Purim Fun." We made them on the Silhouette using the print and cut feature and then went to town with feather, glue, and gems. Each mask is a little work of art from our home. After they were finished, we affixed them to paper straws to mimic the stick on a real mask and help it stick in the basket.

Step Four: In-fill the basket with your squishy-est item (in this case the marshmallows), which will help hold it all in place. Add a cute gift tag if it wasn't already on your sign. I am a "more is more" kind of person, so I did both!


Step Five: Know your Audience! While I made sweet little family-sized baskets for some friends, I wanted to deliver baskets to the staff of some Jewish Philanthropic Organizations near to our hearts. Not only was it a must that the baskets be larger to feed the group, I needed these recipients to know that the items were kosher. I left their marshmallows in the packaging so they could see they were of the vegan, kosher variety. In addition to ensuring the kashrut, I knew I must also ensure that the chocolate in these baskets was organic and fair-traded due to the ethics of the group. Rather than leaving a sour taste in my friend's mouth, I wanted to make sure they got a sweet treat. Same goes for any preference of the recipient--make sure you think of what they would like!

In addition to the office staffs, we always pick just a few friends to give baskets. If gave to everyone we wanted, I would easily be delivering 60 baskets. Since no one has time for that madness, we limited ourselves to 8 one year. That was like a magic number and we have always stuck with it--rotating who gets them any given year. I ran out to deliver a few this morning to the offices, but I am going to let the kids of giving to their friends this afternoon!

Friday, February 27, 2015

Dollar store baskets that look like a million bucks: Part 2

I am back with some more baskets today. Up next are my friend Courtney's baskets. Courtney's baskets are actually to thank some people who were extra helpful during her battle with breast cancer, which is why they are so plentiful. While she elected to fill the baskets with expensive gourmet goods, the baskets themselves were from the dollar store and were styled for little money. We began with $1 buckets, which we personalized with vinyl. I cut these on my Silhouette machine. You could do it with stickers easily, however, if you do not own one.


We separated her goodies into individual bags with labels. I started to cut these on the silhouette, but it was giving me fits (I have the original model and it may be nearing it's end). So, I free-handed these toppers instead:

To affix them, simply staple the back to the bag and then use a glue stick on the front (this way the staple won't show). Here they are arranged in the basket:

Finally, she made baskets for her nieces with traditional Purim cookies, known as Hamantaschen. She denoted the different flavors with tags made from a circle punch and a label maker (even though I have a fancy machine, sometimes it is nice to use old school supplies). You can easily make these at home:

Delivering these sweet baskets will certainly show the recipients how much Courtney appreciated their aid in her darkest hour! How's that for a Friendly Friday?

Wednesday, February 25, 2015

Dollar Store Baskets that Look Like a Million Bucks: Part One

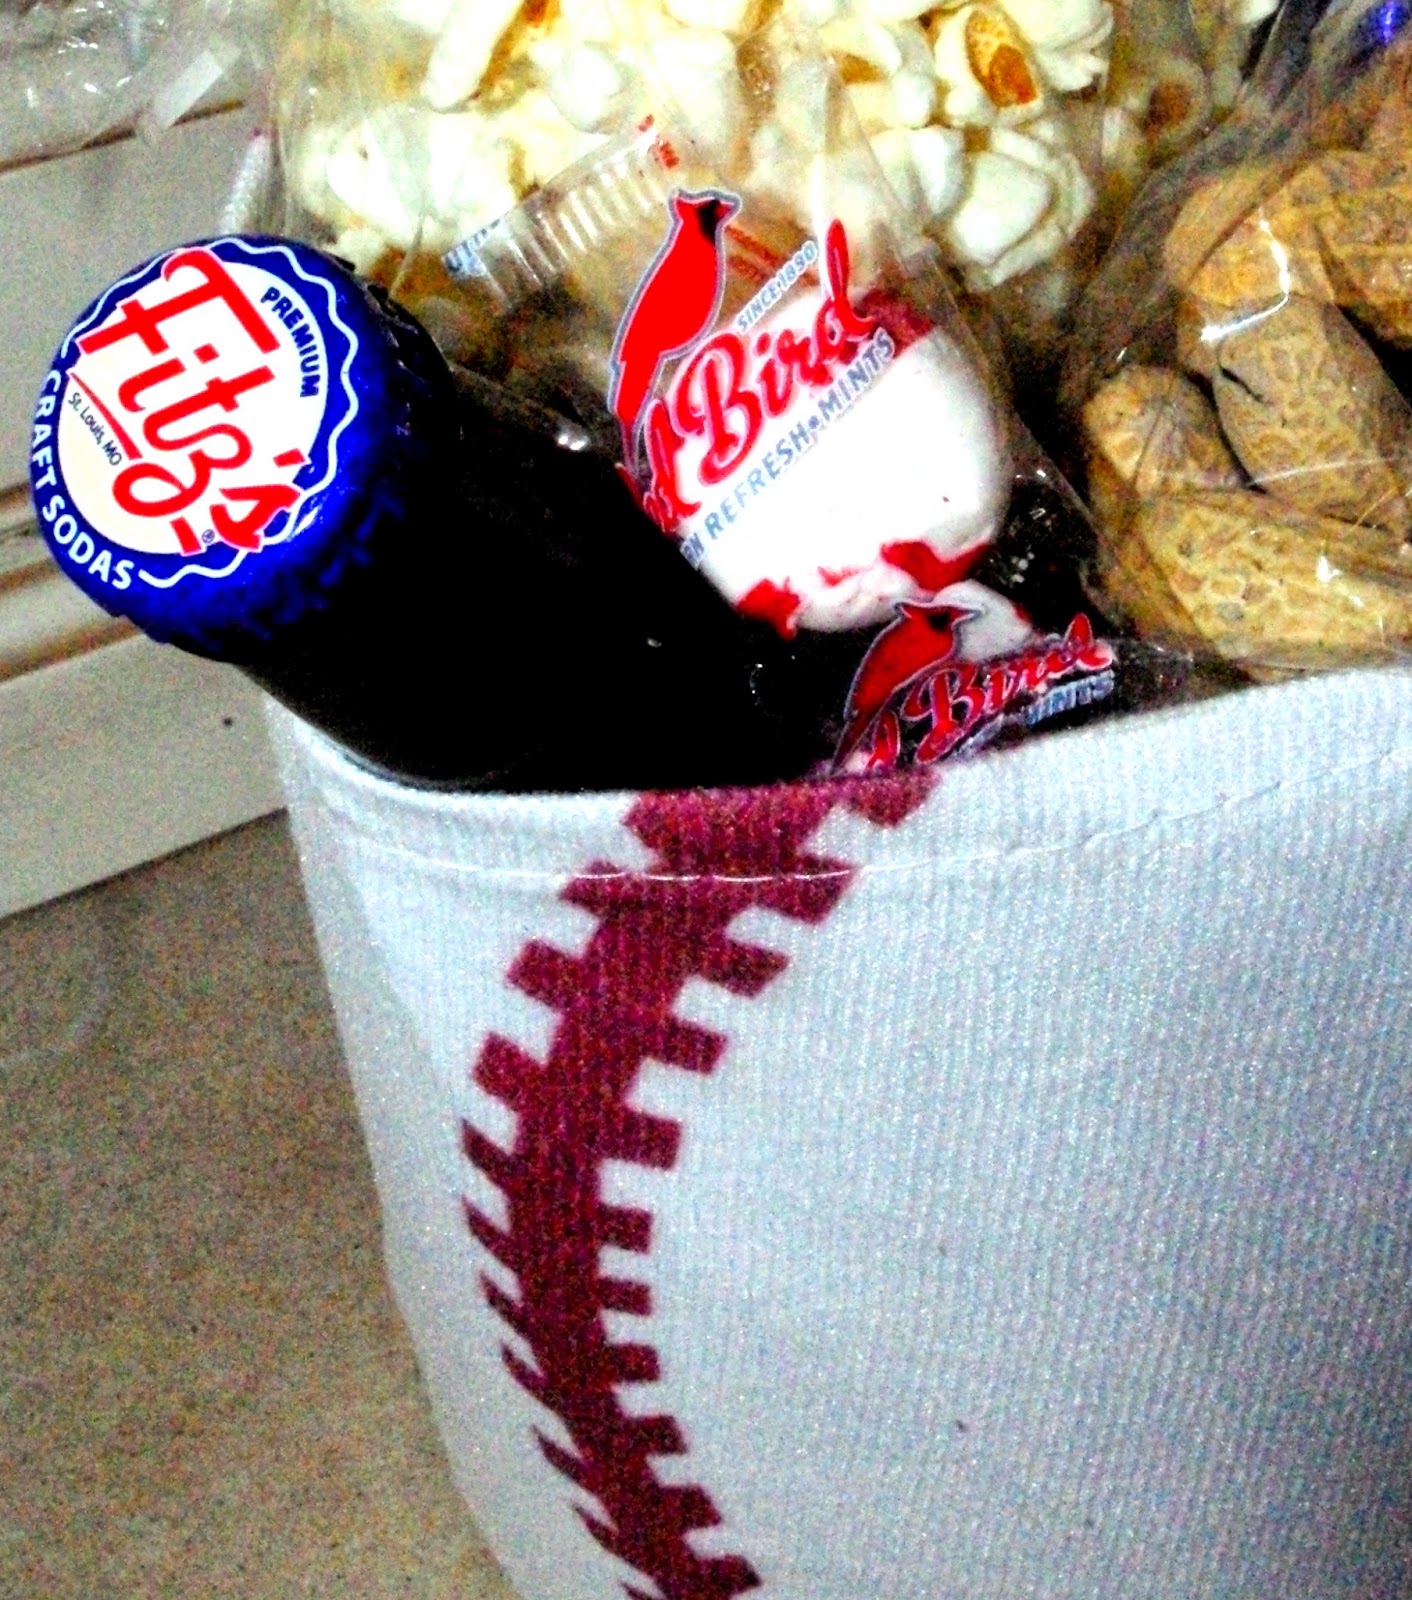
According to Mr. 31-derful, I throw a party every time someone sneezes. He's probably right, and it gets expensive. That's why one of my favorite stops for entertaining and clever crafts is the dollar store. Specifically, I like Dollar Tree, but any $1 store works! I have a legitimate reason to party as we are celebrating a holiday next week. I am very excited to share the first in a series of baskets I am either making or helping friends make for the occasion (more on the tradition after the pictures)! May I "Take You Out to the Ballgame?":


These baskets are being made by my neighbor, who was scared of the dollar store. We went with no particular ideas in mind. That is the best way to go there, because it is "like a box of chocolates, you never know what you are going to get!" I spied those pretty felt baseball baskets with in a minute of being in the door. Instantly, we had a theme. We began shopping the store for peanuts, popcorn, baseball themed items, Baby Ruths and root-beer in bottles. To be fair they didn't have the peanuts in the shell or the root-beer, but they did have Redbird Mints that we stumbled upon. They are a must in a St. Louis Baseball Basket. Here are the pretties all put together with a baseball stress-ball and cute, themed card:


The total cost was $43.10 for 8 basket (about 5.60 each), but they look expensive. The baskets would be great for hostess gifts, wedding hospitality, Easter Baskets, May Day, Teacher Appreciation, etc. Mine, however, were made to celebrate the upcoming Jewish Holiday of Purim.

Purim baskets, or mishloach manot, are gifts of food or drink that are sent to friends, relatives, neighbors, teachers, business associates, and any other acquaintances on Purim day. The tradition derives from the Book of Esther. It is meant to ensure that everyone has enough food and to increase love and friendship. Traditionally, the baskets include at least two different types of food. The practice is a fairly prominent feature of Purim among the religious community but not as much among Reform and Conservative Jews. As you know I am not religious, but I do care about tradition, and this is a really easy, fun one to keep. I will be back with another friend's baskets tomorrow and mine on Friday!

No Minimalist Here

Friday, February 6, 2015

Friendly Friday: Our Tree Celebration

We had some old, good friends over as we celebrated a minor holiday sometimes called the birthday of the trees! This little chalkboard has been hanging on the door to our art room as long as I can remember. There is an entire chalkboard wall in that room, so I am not sure how this originally got there. Anyhow now it is a tradition! We change the ribbon and message all the time.


We set up a little planting station on the kitchen table for the kids to make mason jar terrariums. Since the idea of the holiday is about trees waking from their winter slumber, I thought this fit right in. You will see the book A Tree is Nice in the background of one picture. It is such a sweet book, and I would really recommend it for kids of all ages.


Above are a few shots of my table. You'll notice we didn't have any silverware or plates down at this point because we were reading from placemats I created. We noshed on the fruit and nuts in the center as we read about four categories of fruits, which represent the four seasons and aspects of the human personality. The four sections of the service each have a corresponding glass of juice to symbolize the same--from Winter (white) to Fall (red). These are just thimble size glasses--I know they look huge in this picture!


After the service (it was six minutes tops), we served a buffet dinner of colorful, natural dishes. We had zucchini boats, tomato-cucumber salad, cut veggies for the kids and orzo. I used twigs and lemons to decorate the buffet to represent trees:

It was a quick weeknight celebration, and all was neatly put away by 8:30. Overnight, we had a snowfall that dusted our yard, but the terrarium in the window reminded me that Spring is not far off!